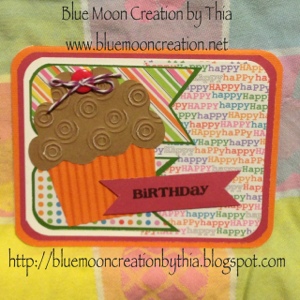
This is a collection of cards that I created in 2012 that are special creations that won ribbons, was published in a magazine,made Top 3, or that I just really enjoyed making. A few are my recent Christmas Card Creations. I hope you enjoy!
Thursday, December 27, 2012
Wednesday, December 26, 2012
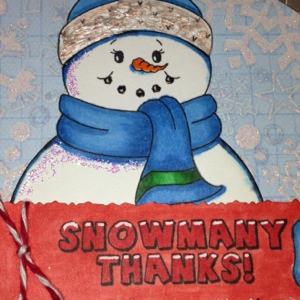
Snowmany Thanks
Hello...I created this round thank you card to enter into this weeks Peachy Keen Challenge, anything goes. I'd love to enter the Christmas Tree that I'm making, but I'm not finished just yet. So I'll share that with you later. For now, here's this snowman...
Tuesday, December 18, 2012
Snowman's Hat Card
Hi! Christmas is almost here and I'm still creating new Christmas cards. This cardI came up with after looking at this weeks challenge on My Craft Spot. No die cut machine used, I made this one with scissors. I used my Copic markers to get just the right color on the ribbon I used for the hat band. Enjoy!
Monday, December 17, 2012
Peachy Keen Birthday Challenge
This weeks Peachy Keen Challenge is a birthday card sketch challenge for the Peachy Queen (as her design team seems to call her), herself. This is my take on their sketch. I used a few PKStamps to create this card. I hope you enjoy it!
Friday, December 14, 2012
Let It Snow Globe Tag/Ornament
Playing around with my paper punches, I discovered I can create this simple snow globe peachy keen snowman tag that can double as an ornament. Very easy to do too!
Punches Used:
Fiskars 2.5" circle punch
Fiskars 2" scallop punch
EK Success For Sale Sign Punch
Stampin Up Word Punch
Stamps Used:
Peachy Keen Stamps PK-306A Snow Happy Mini
Snowflake Stamp
I'm entering this in the DL.Art Challenge Ornament and a Ribbon.
Punches Used:
Fiskars 2.5" circle punch
Fiskars 2" scallop punch
EK Success For Sale Sign Punch
Stampin Up Word Punch
Stamps Used:
Peachy Keen Stamps PK-306A Snow Happy Mini
Snowflake Stamp
I'm entering this in the DL.Art Challenge Ornament and a Ribbon.
Sunday, December 9, 2012
Jolly Snowman Ornaments
Happy Holidays! After making a gift tag, I decided that I needed to get a bit more creative and make one a cute Christmas ornament. So to my Cricut I went with my Speaking of Winter cartridge.
And now, that I think about it...it can be a gift tag and then even be used as a personalized ornament! How cool is that?!
I cut some 4" by 4" snowflakes (used 2-3 depending on how thick you'd like it..the thicker, the less fragile it will be). Then I used a 2" circle punch and punched out 2 patterned papers as well as a white. (The white one I dot embossed then cut to look like snow hills.) I then stamped a few HERO ART snowmen on white paper, minus the face so I could use cute Peachy Keen faces. After that, I ran the snowmen through my cuttlebug machine with my snowman die. Stamped a word on one of the patterned circles (this is where you could use a name instead). I then glued the piecestogether, and colored them with my Copics, used an orange Glaze Pen on the nose. Faux stiching around the edges of the circles with a white pen. Added some snowballs and stickles. Tied with ribbon and made a bow. Viola! I hope you like them. I'm going to enter them in this weeks Peachy Keen contest. Until next time...
Monday, December 3, 2012
Thia's Pot Pie...Not
9" x 12" baking dish
1 pound Ground Beef/Ground Turkey
onion (fresh or dried 1/8 dried or 1/4 fresh)
1 jar of gravy (beef or turkey) I use Heinz brand
6 servings Mashed Potatoes (as per box) Note: I omit salt and use a chicken bouillon cube instead.
1 can Low Salt Peas (*small can if making with carrots)
1 can Low Salt Corn (*small can if making with carrots)
1 can Low Salt Canned Green Beans
1 can Carrots (*Optional*)
Topping
1.25 cups of Bisquick
2 cups water
1 tablespoon butter sliced into tiny squares (to dot topping with)
Make potatoes and spoon evenly into the baking dish and put aside. Brown the meat and onion. Once cooked through, reduce heat and add the canned vegetables, gravy, and mix together over medium low heat. Pour this evenly over the mashed potatoes. Set aside to make topping. Combine the water and bisquick then whisk until the lumps aren't visible. Pour topping evenly over the meat and veggies, then scatter tiny cubes of butter on top. Put in preheated oven at 375 degrees and bake for 40-45 minutes or until top cracks and is golden brown. Topping is biscuit like, rather than crust like. (I will have to make this again to see if less topping would make it come out more crust like.) Let me know if you try this and your thoughts. Enjoy!
Sunday, December 2, 2012
Mojo Monday Challenge
Here's a birthday card that I just finished with this weeks sketch...uploaded it with one minute left to link up. I still have a few finishing touches to do, but for the most part, it's done. I couldn't decide circle or square, so I went with a rectangle with rounded edges. Here's the sketch, and my card.
Purple Elephant Card
My mom loves elephants...And the color purple, so I figured since its her birthday, I'd make a Purple Elephant Card. So with the Peachy Keen Shape Challenge going on this week, I decided to do just that. I was in a bit of a hurry (family was waiting on me so we could leave for Disneyland for the evening), and I messed up. I was almost finished with the card too! So, the feet are messed up a bit. I tried to recover from the incident and know for next time. Until next time, enjoy.
Saturday, December 1, 2012
Making Cards That Pop
Happy Saturday! I've been working on a turtle card that I wanted to share with you. As I continued working on it, I decided it didn't POP like I wanted it to, so I changed it up until it had a look I liked.
Subscribe to:
Comments (Atom)


